


The race is on for fall projects…
Our first taste of late autumn chill may have already paid a visit as renovation to ballfields hits a fevered pitch. The pressure is mounting to get field projects done before the colder winter weather settles in across much of the United States.
In the northern parts of the country, we have just a few more weeks before old man winter’s icy winds will begin to shut things down. But down south, there is still ample time to do important renovation work to your fields provided there is a break in the scheduled use of your facility.
In this post, we’ll pay close attention to the two areas on the ball field that see the bulk of the abusive wear all summer — the mound and home plate areas.
What started as a great pitching mound in the spring, with its well defined table and perfectly sculpted front slope, sometimes better resemble a pimple by the end.
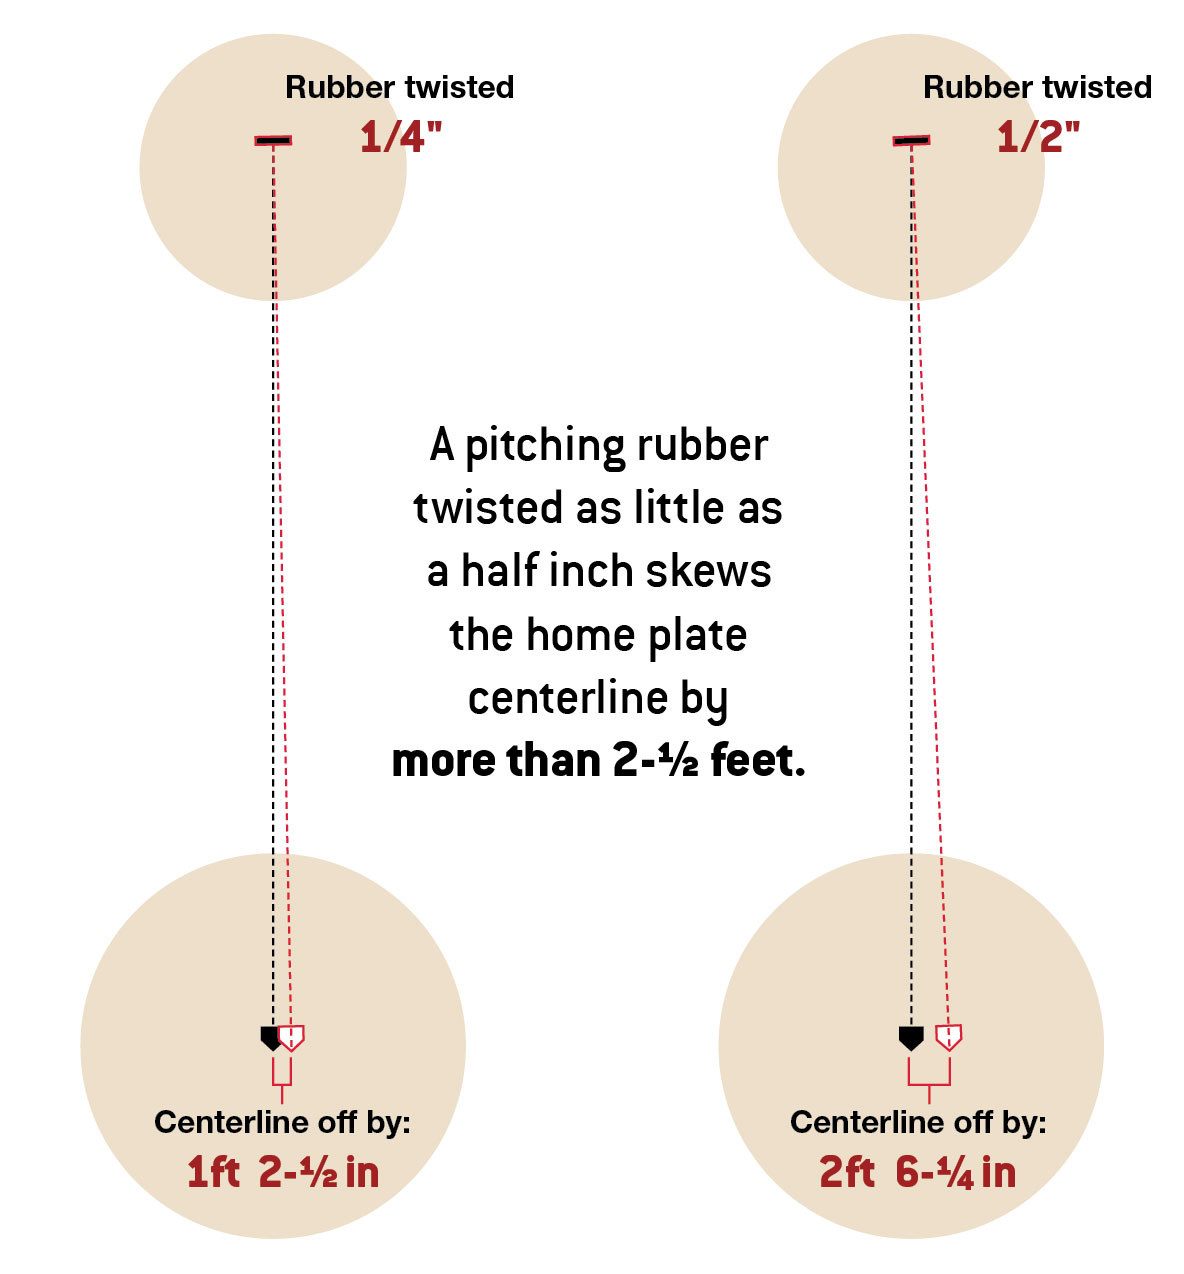 To start the mound renovation process, you should begin with determining whether the pitching rubber needs to be replaced or turned (If it is a block pitching rubber). If the rubber needs replacing or turning, reference the directions under “Setting The Pitching Rubber” in Beacon’s Online Field Dimensions & Reference Guide (order a hard copy today from our webstore) to ensure proper placement and alignment of the new or turned pitching rubber. Read our special article on the importance of a properly aligned rubber in our story, Pitching Rubbers: It’s Hip to be Square.
Once the pitching rubber is secure, sweep all loose soil and topdressing material off the entire mound surface and dispose of it. All loose contaminants like this must be removed in order for new clay to properly bind to the existing mound clay. Score the area where the table is located at the top of the mound to cut down any high spots and provide a rough surface for new clay to bind to. Add clay as needed until the clay surface of the mound table is level and even with the surface of the rubber once fully compacted. Check the surface of the table with a level for accuracy.
Next, setup a mound slope gauge on the front of the mound to measure existing conditions. Cut and shave any high areas while marking to indicate low areas. Add clay where needed, roll and tamp firmly. Replace the gauge on the front slope of the mound and continue to make adjustments as needed until the slope across the face of the mound is perfect. Finish by rolling the front slope smooth. The sides and back of the mound should have a consistent slope that runs from the clay area edges on the mound to the grass edge at the base of the mound.
If you topdress your mound, I would suggest holding off until the start of next season so it looks fresh when that first game is played in the spring. Plus, if you are in a northern climate where frost is likely, you will probably see some heaving of the surface of the mound which should be rolled next spring before applying the topdressing. Your mound is now ready to overwinter. Remember to keep it covered, if possible, to prevent erosion from rainfall.
The home plate area also suffers its share of abuse over the course of a season. Low spots are likely in the batter’s and catcher’s boxes and where the runners accelerate up the foul line just outside of the left-handed batter’s box. High spots usually develop where the umpire stands behind the catcher and along the outer edge of the home plate circle from dragging.
Before winter sets in, strip all loose topdressing and soils from the home plate area. Aggressively nail drag the home plate area to scarify the high spots down. Use a level board or rake to pull the excess material in the high spots away and into the low areas. Continue to work the surface until the high spots appears level. Check your work by stretching a string line from the surface of the home plate to the grass edge of the home plate circle. Make sure the string is very tight to avoid improper readings. Where the surface pushes the string up, it is likely still high. Use a sharpened iron rake or X-drag to make further cuts to lower the high spots then pull the excess to low areas. Bring in additional material as needed to finish the leveling. When finished roll the soil tight.
If the home plate is in need of replacing or flipping (if you have a 2-sided plate), this can be done before or after re-leveling the home plate area. Be sure to accurately measure all distance points from the plate and that the plate sits level when finished.
 Since the home plate area is mostly a flat level surface, I usually will leave this area uncovered during the winter to allow it to gobble up as much moisture as it can. Again, I suggest not to place fresh topdressing on this area until spring. That brings me to a point I forgot to mention in last month’s post. More and more recreational fields are using topdressings on them, which is a very good thing. But there is something you should consider in preparing your fields to overwinter. Some topdressing materials more than others can easily be blown around by winter winds. Winter is when we typically see our strongest winds, usually associated with the stronger winter storms.
If your field is in a northern climate where snow covers the ground during the majority of the winter, then there is nothing to worry about.
However, if you are in a part of the country where your field sits all winter unprotected from the wind, then you are susceptible to having some of your topdressing building up in the grass edges of your infield skin over winter.
Up at the higher levels of ballfield management, crews usually remove the topdressing layer once the ball season is over in order to prevent the material from building lips over the winter. In the recreational ballfield setting, this usually isn’t possible due to the number of fields and lack of time and resources to dedicate to the project.
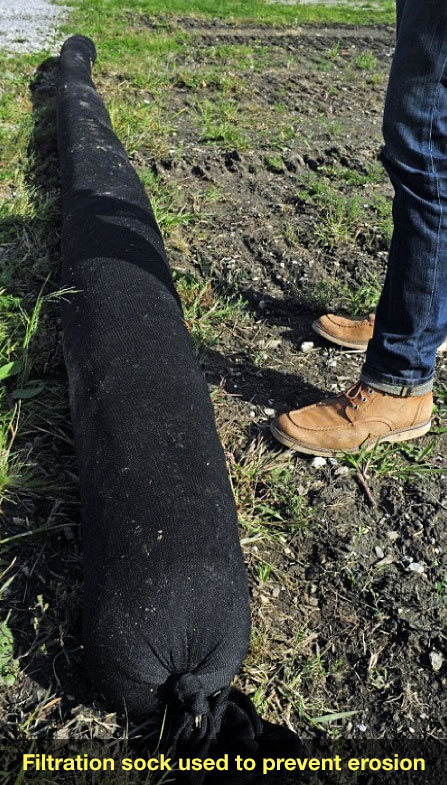
So, there are other ways to protect your field, like stapling down filtration socks (pictured) near the edges of the infield skins to stop the topdressing from blowing into the grass edges. These socks are often filled with chopped straw, compost, or other lightweight materials, and are really all it takes to keep your topdressing on the infield and out of your grass edges. Cheap, easy, and quick to put in place. It sure beats spending time in the spring cleaning out your turf edges.
Perhaps you have other ideas on how to capture the topdressing before it plants itself in your turf edges. If you do, send us your pictures and ideas (info@beaconathletics.com) and we’ll share them with our readers here at the Ballfields Blog.
Keep our DuraEdge ProLoc Mound Blocks in mind for all of your post-season mound and home plate renovations. It’s a great option for those heavy traffic areas. One last thing… you may be interested in watching the Bulldog Home Plate Installation video. Until next time…


